Why Tevo Tarantula Nozzle Replacement Matters
The Tevo Tarantula is a popular 3D printer, known for its affordability and ease of use. However, like any 3D printer, it requires regular maintenance to ensure optimal print quality. One of the most crucial maintenance tasks is nozzle replacement. A worn or damaged nozzle can significantly impact the quality of your prints, leading to frustrating results and wasted filament. Understanding the importance of nozzle replacement and knowing how to do it correctly can save you time, money, and a lot of headaches. This guide will walk you through the entire process, making it easy even for beginners.
Signs You Need a New Nozzle
Knowing when to replace your Tevo Tarantula nozzle is key to maintaining excellent print quality. Several telltale signs indicate that your nozzle needs attention. Recognizing these signs early can prevent print failures and material waste. Regularly inspecting your nozzle and paying attention to your prints is crucial for proactive maintenance.
Print Quality Issues

One of the most obvious signs of a worn nozzle is a decline in print quality. This can manifest in various ways, such as rough surfaces, inconsistent layer lines, and a general lack of detail. If your prints are not coming out as smooth and precise as they used to, the nozzle is the first component to inspect. These print quality issues can stem from the nozzle’s orifice being enlarged or worn, which disrupts the precision of filament extrusion.
Clogging Problems
Clogging is another common issue that often indicates a worn or damaged nozzle. Clogs can prevent filament from extruding properly, leading to incomplete layers or failed prints. If you frequently experience clogs, even after cleaning the nozzle, it’s likely time for a replacement. The internal structure of the nozzle might be damaged or the nozzle material may be degrading, causing filament to stick and block the flow.
Nozzle Wear and Tear
Over time, the nozzle will experience wear and tear due to friction with the print bed and the abrasive nature of some filaments. This wear can gradually enlarge the nozzle’s orifice or cause it to become misshapen, leading to print quality degradation. Regular visual inspection can help identify wear and tear before it significantly impacts your prints. Using abrasive filaments like those containing carbon fiber or metal particles will accelerate nozzle wear, making more frequent replacements necessary.
Tools and Materials Needed for Replacement

Before you start replacing your Tevo Tarantula nozzle, gather all the necessary tools and materials. Having everything ready will streamline the process and ensure a smooth replacement. Proper preparation is the key to a successful outcome. Ensure all tools are in good condition and that you have the correct type of replacement nozzle for your printer.
Essential Tools
You’ll need a few essential tools to replace the nozzle. These include a wrench or socket set for removing and installing the nozzle. A pair of pliers is also useful for gripping the hotend or nozzle during the process. Make sure you have a way to heat the hotend, such as the printer’s control panel. It’s also helpful to have a small wire brush for cleaning the hotend and a nozzle cleaning tool to clear any filament residue. Safety glasses are also essential to protect your eyes from potential hazards.
Replacement Nozzles
You will, of course, need a replacement nozzle. Make sure you have the correct size and type for your Tevo Tarantula. Nozzles come in various sizes (e.g., 0.4mm, 0.6mm) and materials (e.g., brass, stainless steel, hardened steel). Brass nozzles are suitable for most filaments, while hardened steel nozzles are better for abrasive filaments. It is wise to have a few spares on hand. Consider different nozzle sizes to vary print resolution.
Safety Precautions Before You Start

Safety should always be your top priority when working with 3D printers. Before you begin the nozzle replacement, take a few essential safety precautions to protect yourself and your equipment. These precautions will ensure that the process is as safe as possible.
- Always turn off and unplug your printer before performing any maintenance tasks.
- Be careful when handling the hotend, as it will be hot during the replacement process. Use heat-resistant gloves to prevent burns.
- Work in a well-ventilated area to avoid inhaling any fumes from the heated plastic.
- Let the hotend cool down completely before touching any components.
- Wear safety glasses to protect your eyes from molten plastic or debris.
Step-by-Step Tevo Tarantula Nozzle Replacement
Now, let’s get to the actual nozzle replacement process. Follow these steps carefully to ensure a successful replacement. Take your time and double-check each step. The following steps will help you replace the nozzle efficiently and effectively.
Heating Up the Hotend
Before you can remove the old nozzle, you need to heat up the hotend. Go to the printer’s control panel and set the temperature to the typical printing temperature for the filament you are using (e.g., 200°C for PLA, 230°C for ABS). This will soften the filament inside the hotend, making it easier to remove the nozzle. Wait until the hotend reaches the set temperature before proceeding.
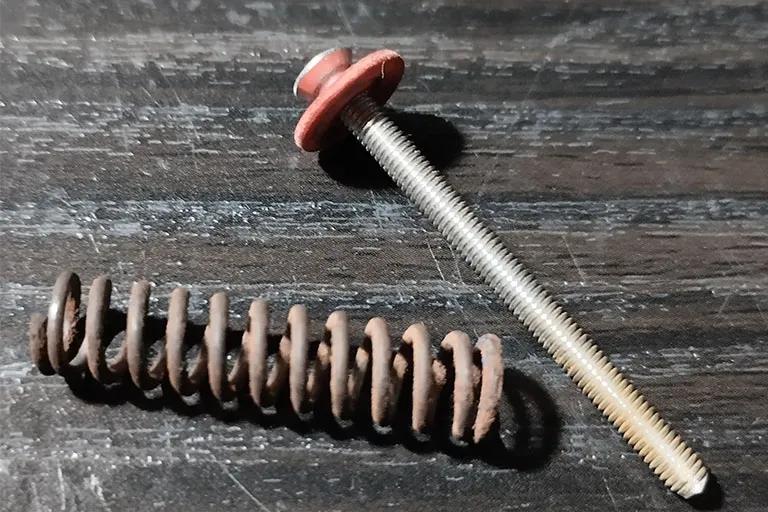
Removing the Old Nozzle

Once the hotend is heated, carefully use a wrench or socket to loosen the old nozzle. Be cautious, as the hotend can be hot. Hold the hotend with pliers if necessary to prevent it from turning. Turn the nozzle counterclockwise to unscrew it. Once loosened, remove the nozzle completely. If filament is stuck in the threads, use a nozzle cleaning tool to clean them before installing the new nozzle. The image shows how to safely remove the old nozzle.
Installing the New Nozzle
Take the new nozzle and screw it into the hotend. Hand-tighten it initially. Then, using a wrench or socket, tighten the nozzle firmly. Do not overtighten it, as this could damage the threads. Make sure the nozzle is snug against the hotend. Overtightening can also cause leaks. Ensure there are no gaps between the nozzle and the heat block to prevent filament leakage during printing. The image shows the new nozzle installation.
Tightening and Securing the New Nozzle
Once the nozzle is installed, ensure it is tightened securely. Use a wrench or socket to tighten the nozzle firmly against the heat block. The goal is to create a tight seal to prevent filament leakage. Check for any gaps around the nozzle. If there is a gap, the nozzle may not be properly seated, leading to printing issues. Re-tighten carefully until secure, but be careful not to damage any components.
Calibrating and Testing After Replacement

After replacing the nozzle, you need to calibrate the printer to ensure proper print quality. These calibration steps will help to make sure everything is aligned and adjusted correctly.
Temperature Calibration
Since you have a new nozzle, it is essential to re-calibrate the printing temperature for your filament. Every nozzle material may have slightly different thermal characteristics, which can affect the temperature required for optimal printing. Start with the recommended temperature for your filament and adjust in small increments, based on the quality of your prints.
Bed Leveling
Bed leveling is crucial after any nozzle change. The new nozzle’s height may differ slightly from the old one, so the bed needs to be leveled again. Use the printer’s leveling features or manually adjust the bed screws until the nozzle is the correct distance from the print bed across the entire surface. Proper bed leveling is critical for first-layer adhesion and overall print quality. The image shows a bed leveling procedure.
First Test Print

Once the temperature is calibrated and the bed is leveled, perform a test print. Print a small, simple object to check the print quality, adhesion, and layer consistency. This test print will help you identify any remaining issues and fine-tune your settings. If there are any issues, you can make further adjustments to the temperature, bed leveling, or other settings as needed.
Troubleshooting Common Issues
Even after a nozzle replacement, you might encounter some issues. Knowing how to troubleshoot these problems can save you time and frustration. Here are some common issues and how to resolve them.
Nozzle Leaks
Nozzle leaks usually occur because the nozzle isn’t tightened correctly or isn’t properly seated against the heat block. If you see plastic leaking from the nozzle threads, carefully tighten the nozzle while the hotend is heated. If the leak persists, remove the nozzle, clean the threads, and reinstall it, ensuring a tight seal. Inspect the heat break for potential damage.
Poor Adhesion
Poor adhesion can be caused by incorrect bed leveling, incorrect temperature settings, or a dirty print bed. Re-level the bed, adjust the printing temperature, and clean the bed with isopropyl alcohol. Ensure the first layer is properly squished onto the bed. If using bed adhesion aids, make sure to use the correct ones and apply them properly.
Nozzle Clogging After Replacement
If the nozzle clogs shortly after replacement, there may be debris in the hotend or filament. Try cleaning the hotend with a nozzle cleaning tool or by performing an atomic pull (cold pull). Make sure your filament is dry and free of debris. Also, ensure you are using the correct temperature for your filament.
Maintenance and Prevention Tips
Regular maintenance and preventative measures can significantly extend the life of your nozzles and improve print quality. The following tips will help you keep your 3D printer running smoothly.
Regular Cleaning
Clean your nozzle regularly to prevent clogs and ensure consistent print quality. Use a nozzle cleaning tool to remove any filament residue. You can also perform atomic pulls to remove any debris from the hotend. Regularly clean the hotend, nozzle, and surrounding areas to prevent any build-up of filament.
Proper Filament Storage
Store your filaments in a dry, airtight container to prevent moisture absorption. Moisture can cause clogs and reduce print quality. Consider using a filament dryer to remove any moisture before printing, especially if you live in a humid environment. Proper filament storage is vital for the longevity of your nozzles and quality of your prints.
Nozzle Replacement Frequency
The frequency of nozzle replacement depends on several factors, including the type of filament used, print volume, and print settings. For standard filaments like PLA and ABS, you might need to replace the nozzle every few months, or even less frequently. If you use abrasive filaments like those containing carbon fiber, you will need to replace the nozzle more often. Monitor your print quality, and replace the nozzle when you notice any degradation in performance. Consider having a spare nozzle on hand to avoid down time.