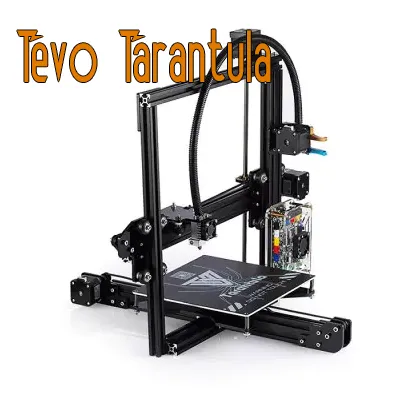
What is the Tevo Tarantula 3D Printer
The Tevo Tarantula is a popular and affordable 3D printer, well-regarded in the maker community for its ease of use and modifiability. It’s an ideal machine for beginners looking to enter the world of 3D printing without breaking the bank. Known for its open-frame design and ability to print with various filaments, the Tevo Tarantula offers a great balance of features and value. It’s a gateway to creating functional prototypes, artistic designs, and replacement parts, making it a versatile tool for hobbyists, students, and anyone interested in additive manufacturing. The printer’s open-source nature further enhances its appeal, allowing users to customize and upgrade components easily.
Key Features and Specifications
Understanding the key features and specifications of the Tevo Tarantula is essential before getting started. Key specifications include the build volume, usually around 220 x 220 x 240 mm, which dictates the maximum size of your prints. The printer typically uses a heated bed, allowing it to print with materials like ABS, PLA, and PETG. It features a single extruder, though upgrades to dual extruders are possible. The frame is typically made of aluminum extrusions, providing a sturdy base for printing. Key features include a user-friendly LCD screen for controlling the printer, a microSD card slot for loading print files, and the ability to print from various software programs. Knowing these aspects will help you manage expectations and understand the capabilities of your machine.
Assembly Guide

Assembling your Tevo Tarantula is a crucial first step. The printer comes as a kit, so you’ll need to put it together. Carefully follow the provided instructions. The assembly process can be broken down into several stages, starting with unboxing and preparation. Make sure you have all the required tools, such as Allen wrenches and a screwdriver. Take your time and double-check each step before moving on. Proper assembly is key to ensuring accurate prints and preventing future issues. Many online videos are available that demonstrate the process visually, proving to be very helpful. It usually takes a few hours to assemble it completely.
Unboxing and Preparation
Upon receiving your Tevo Tarantula, the first step is unboxing. Carefully inspect all components to ensure everything is present and undamaged. Lay out all the parts and organize them. Separate screws, nuts, and other hardware, and review the parts list in the manual to ensure nothing is missing. Having a clean and organized workspace will make the assembly process smoother. Inspect for any shipping damage and contact the seller immediately if you find any issues. This initial step sets the foundation for a successful build, minimizing potential frustrations later.
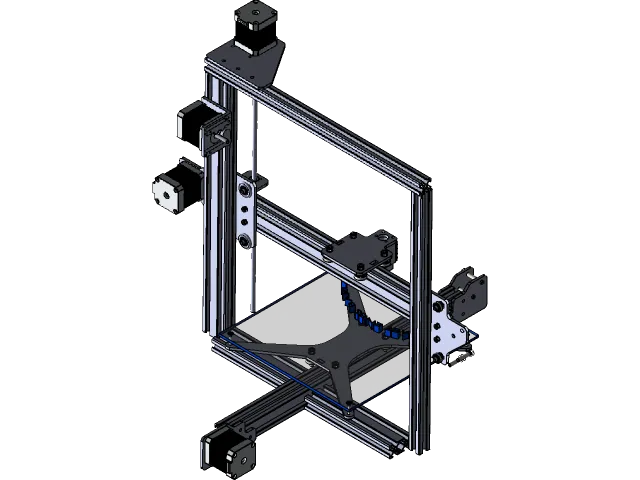
Frame and Components Assembly
The next stage involves assembling the frame and mounting essential components. This includes constructing the frame from the provided aluminum extrusions, attaching the bed, and installing the Z-axis leadscrews and motors. Pay close attention to alignment and ensure the frame is square. Securely fasten all screws, but don’t overtighten them. Mounting the hotend, extruder, and other moving parts also requires careful attention. Regularly referencing the manual or online guides will help you avoid common mistakes. This stage provides the structural integrity of your printer, so proper assembly is crucial for print quality and stability.
Electronics and Wiring
Once the frame is assembled, you’ll need to handle the electronics and wiring. This involves connecting the motors, endstops, hotend, heated bed, and the LCD screen to the mainboard. Carefully follow the wiring diagrams in the manual, ensuring all connections are secure and correctly oriented. Double-check the polarity of all connections to prevent damage. Cable management is also essential at this stage. Properly routing and securing the wires with cable ties or other methods will keep the printer organized and prevent potential interference with moving parts. The safety of your printer depends on proper wiring.
Bed Leveling and Calibration
Bed leveling and calibration are among the most crucial steps for achieving good print quality. A properly leveled bed ensures that the first layer of the print adheres correctly, which is fundamental for successful prints. The Tevo Tarantula uses a manual bed leveling system, typically with adjustment knobs under the bed. Before calibrating, make sure the bed is clean and free of debris. Use a piece of paper or feeler gauge to set the nozzle height at each corner of the bed, ensuring consistent spacing. After leveling, calibrate the Z-offset to fine-tune the distance between the nozzle and the bed. Repeat this process as needed to ensure optimal adhesion.
Initial Setup and Firmware
After the physical assembly, it’s time for the initial setup and firmware configuration. Connect the printer to a power source and turn it on. Access the menu on the LCD screen to set the printer’s settings. This includes setting the correct bed temperature, nozzle temperature, and other print parameters. The default firmware installed may need adjustments. Often, you’ll need to flash the firmware using a software like Arduino IDE to customize settings or resolve issues. Ensure you download the correct firmware version for your printer model. Calibration of the endstops and motor directions is often necessary.
Slicing Software and Settings

Slicing software is essential for preparing 3D models for printing. This software converts your 3D model into instructions that the printer can understand. Popular slicing software options include Cura, PrusaSlicer, and Simplify3D. Each of these programs converts a 3D model into G-code, which is a set of instructions that the 3D printer follows during the printing process. Choosing the right software and adjusting the settings is critical. Slicing settings affect print quality, speed, and material usage. It involves fine-tuning settings like layer height, infill density, print speed, and temperature. Experimenting with different settings will help optimize your prints.
Understanding Slicing Software
Understanding the features and functions of your chosen slicing software is key to successful printing. Become familiar with the user interface and the various settings options available. Familiarize yourself with the model preview, which allows you to visualize how the print will look before starting. The software allows you to orient the model on the print bed, add support structures, and scale it to the required size. Learn about different infill patterns and how they affect the strength and printing time of the model. Understand how to configure the material settings, such as nozzle temperature and bed temperature, which are specific to the filament being used. These are all crucial aspects of the slicing process.
Recommended Slicing Settings
Starting with recommended slicing settings is a good way to ensure successful prints. These settings typically include a layer height between 0.1 and 0.2 mm for good quality, a print speed of 40-60 mm/s for the initial layers, and a bed temperature suitable for the chosen filament (typically 50-70°C for PLA). For PLA, a nozzle temperature between 190-220°C is common. Experiment with different infill percentages. Using 15-20% infill is adequate for many projects. These settings act as a baseline to help you avoid common issues. Adjust these settings based on the specific material and the desired outcome. Gradually refine your settings as your experience grows.
Filament Selection and Management

Choosing the right filament is critical to 3D printing. Different filaments have different properties and require different settings. PLA (Polylactic Acid) is a popular choice for beginners because it’s easy to print with and biodegradable. ABS (Acrylonitrile Butadiene Styrene) is more durable but requires a heated bed and enclosed environment. PETG (Polyethylene Terephthalate Glycol) offers a balance of strength and ease of printing. Consider the mechanical properties of the material for your project. Storing the filament correctly, often in a dry, airtight container, is important to avoid moisture absorption, which can cause printing problems. Make sure you understand the requirements of each filament.
Choosing the Right Filament
The best filament for your project depends on the intended use and desired properties of the printed object. For general-purpose printing, PLA is a good starting point due to its low printing temperature, minimal warping, and ease of use. If you need a stronger, more heat-resistant part, consider ABS or PETG, which are more difficult to print but offer better properties. For flexible parts, TPU (Thermoplastic Polyurethane) is a good choice, but requires a direct-drive extruder and slower print speeds. Consider the environment the printed part will be exposed to; outdoor applications may benefit from UV-resistant materials.
Filament Loading and Unloading
Loading and unloading filament is a straightforward process, but it’s important to do it correctly to avoid issues. For loading, heat the hotend to the recommended temperature for the filament type. Insert the filament into the extruder and gently push it until it starts to flow out of the nozzle. Ensure the filament feeds smoothly and doesn’t get tangled. For unloading, heat the hotend and then pull the filament out of the extruder. Some printers may have a special function for this. Always trim the end of the filament before loading to ensure a clean start. This step is vital for preventing issues like clogs or air gaps.
First Print

Before initiating your first print, it’s crucial to prepare everything. Double-check all your settings, ensure the bed is properly leveled, and the nozzle is clean. Select a simple test model, such as a calibration cube, which can help you assess the print quality. A pre-print checklist ensures that you haven’t missed anything and minimizes the chance of failures. Following the steps systematically provides the best chance of success.
Pre-Print Checklist
Before starting your first print, run through a checklist. Confirm the bed is clean and level. Verify the nozzle temperature and bed temperature are correct for the filament being used. Ensure the filament is correctly loaded and feeding smoothly. Check that the model is properly sliced and loaded onto the SD card. Inspect the printer’s surroundings for any hazards, and ensure the printer is in a stable place. Make sure all wires are secure and out of the way. Addressing these basic checks will enhance your chances of the first print’s success.
Initiating Your First Print
Once the pre-print checklist is complete, you can start your first print. Select the desired G-code file from the SD card using the LCD screen. Monitor the first layer carefully. Observe the flow of the filament and how it adheres to the bed. Make adjustments to the Z-offset as needed. If problems occur, pause the print and address them. Be patient and learn from any mistakes. Monitor the print for a few minutes to ensure the initial layers adhere correctly. Then, let the printer do its work.
Troubleshooting Common Issues

Troubleshooting is an inevitable part of 3D printing. You will encounter different issues as you gain experience, but they can all be resolved by understanding the root causes. Common problems include nozzle clogging, bed adhesion problems, and layer shifting. Learning how to identify and resolve these issues will allow you to keep printing efficiently. Numerous resources are available online, including forums, tutorials, and troubleshooting guides.
Nozzle Clogging
Nozzle clogging is a common problem that can interrupt prints. This usually occurs when the nozzle becomes blocked by filament. Clogging can be caused by overheating the filament, printing at too low a temperature, or the presence of debris in the filament. To fix a clogged nozzle, you can try using a needle to clear the clog, performing a cold pull (heating the nozzle and then pulling the filament out), or replacing the nozzle entirely. Regular maintenance and careful filament handling will help minimize clogs. The temperature of the nozzle and the type of filament also play an important role.
Bed Adhesion Problems
Poor bed adhesion is a frequent issue, often leading to prints detaching from the bed during printing. It is generally caused by an unlevel bed, improper bed temperature, or the presence of contaminants on the bed surface. To improve bed adhesion, level the bed accurately, apply a bed adhesive (such as glue stick or painter’s tape), and ensure the bed is heated to the correct temperature for the filament being used. You can also try increasing the initial layer height and reducing the print speed for the first layer. Regularly cleaning the bed will also improve adhesion. Check the nozzle height too.
Layer Shifting and Inconsistencies
Layer shifting and inconsistencies result in misaligned or deformed prints. This typically arises due to issues with the belts, loose pulleys, or the printer’s motors. Ensure that the belts are properly tensioned and the pulleys are securely fastened. Check for any obstructions that may be hindering the movement of the print head or bed. Lubricate the smooth rods to ensure smooth movement. Increasing the motor current can sometimes help. Regular maintenance of the mechanics will help. If layer shifting is a recurring problem, consider upgrading the printer’s stepper drivers.
Maintenance and Upkeep
Regular maintenance is essential for keeping your Tevo Tarantula running smoothly and extending its lifespan. Proper maintenance includes cleaning, lubrication, and firmware updates. Establishing a maintenance schedule will ensure long-term print quality. Regular upkeep will reduce the likelihood of unexpected failures.
Regular Cleaning and Lubrication
Regular cleaning and lubrication prevent friction and keep the printer’s moving parts in optimal condition. Clean the nozzle and the print bed after each print. Use a brush or compressed air to remove debris from the frame and other components. Lubricate the Z-axis leadscrews and smooth rods with a suitable lubricant. Avoid getting lubricant on the belts or other areas where it could affect print quality. Make cleaning and lubrication part of your regular maintenance routine.
Firmware Updates
Keeping your printer’s firmware up-to-date improves performance and adds new features. Firmware updates can fix bugs, improve print quality, and introduce new functionality. Check the manufacturer’s website or online forums for firmware updates. Back up your current firmware before updating. Follow the instructions carefully when updating firmware. Ensure you have a suitable environment and power supply. Updating your firmware may improve the capabilities of your 3D printer.
Tevo Tarantula Upgrades and Modifications
The Tevo Tarantula is highly customizable, allowing for numerous upgrades and modifications. Upgrades can improve print quality, speed, and reliability. Consider upgrading the hotend for better temperature control or replacing the stock extruder with a more reliable one. Adding a glass bed will provide a smooth printing surface and improve bed adhesion. Modifying your printer can be a rewarding process. Explore online communities for inspiration. Upgrades allow you to boost the printer’s capabilities.
Enhancements for Better Printing
Enhancements for better printing are achievable through strategic upgrades. A common upgrade is to install a direct-drive extruder for more precise filament control, especially when using flexible filaments. Replacing the stock hotend with an all-metal hotend can allow for higher-temperature printing and better performance with different materials. Adding a glass bed offers a flat and smooth surface and can improve print adhesion. Upgrading the firmware can improve print quality. You can enhance your printing experience through several upgrades, such as improved cooling fans and better bed leveling systems. Always make sure upgrades are compatible.
Community and Resources
Joining the 3D printing community is beneficial for sharing knowledge, getting support, and discovering new techniques. Many online forums, social media groups, and online resources exist for Tevo Tarantula users. These resources can provide troubleshooting assistance, design ideas, and technical support. Participate in online discussions, ask questions, and share your experiences. Exploring these resources will help you improve your skills. The community can also help you find solutions. Learning from other users is an effective way to improve your printing.
In conclusion, the Tevo Tarantula is an excellent 3D printer for those entering the world of additive manufacturing. This Tevo Tarantula guide provides a comprehensive overview of the printer, from initial setup to advanced troubleshooting. By following these steps, you’ll be well on your way to producing amazing 3D prints. Remember to stay patient, experiment, and learn from your mistakes. The world of 3D printing is filled with endless possibilities, and the Tevo Tarantula provides a great platform for exploring them. Happy printing!