Tevo Tarantula Belt Replacement Overview
The Tevo Tarantula is a popular 3D printer known for its affordability and ease of use. However, like any machine, the belts that drive its movement can wear out over time. Replacing the belt is a necessary maintenance task that ensures the printer continues to deliver precise and high-quality prints. This guide provides a comprehensive, step-by-step approach to replacing the belt on your Tevo Tarantula, ensuring that your printer remains in optimal working condition. Whether you’re a seasoned 3D printing enthusiast or just starting out, this guide will help you through the process.
Tools and Materials Needed
Before you begin, gather all the necessary tools and materials. Having everything prepared beforehand will streamline the replacement process and minimize downtime. This ensures you have everything you need at your fingertips. It’s always better to be prepared than to have to stop mid-way to find a tool, so this step is critical to success. Not only that, but preparing also ensures safety by not rushing around and being careful throughout the process.
Gathering the Essentials

You will need a new Tevo Tarantula belt (ensure it’s the correct size and type for your printer model). A set of Allen wrenches (hex keys), usually provided with the printer, is essential. You’ll also need a screwdriver, ideally a Phillips head. Consider having a pair of needle-nose pliers for manipulating the belt and other small parts. A small container or tray to keep screws and other small parts organized can also be helpful. Make sure you have a clean, well-lit workspace. Also, read the printer’s manual for specific instructions. Finally, having some isopropyl alcohol and a clean cloth for cleaning the printer’s components is recommended.
Safety Precautions
Safety should always be your top priority when working with machinery. First and foremost, disconnect the Tevo Tarantula from the power source before starting any maintenance. This prevents any accidental electrical shocks or short circuits. Allow the printer to cool down completely before you begin. Hot components, such as the heated bed and hot end, can cause burns. Wear safety glasses to protect your eyes from any debris or accidental splashes. Work in a well-ventilated area to avoid inhaling any fumes from the printer’s components. Be mindful of moving parts and avoid getting any body parts or loose clothing caught in them. If you’re unsure about any step, consult the printer’s manual or seek assistance from an experienced user.
Step-by-Step Belt Replacement Guide
Powering Off and Preparing the Printer

Begin by completely powering off your Tevo Tarantula and unplugging it from the power outlet. This is a crucial safety measure. Allow the printer to cool down completely, paying specific attention to the hot end and heated bed. Once cool, position the printer on a stable surface, where you have plenty of space to work. Take note of the printer’s current configuration, especially the belt’s routing, before you start disassembling anything. This helps you easily reassemble it later. Consider taking pictures of the belt’s current position. This visual aid is invaluable during reassembly, ensuring you route the new belt correctly.
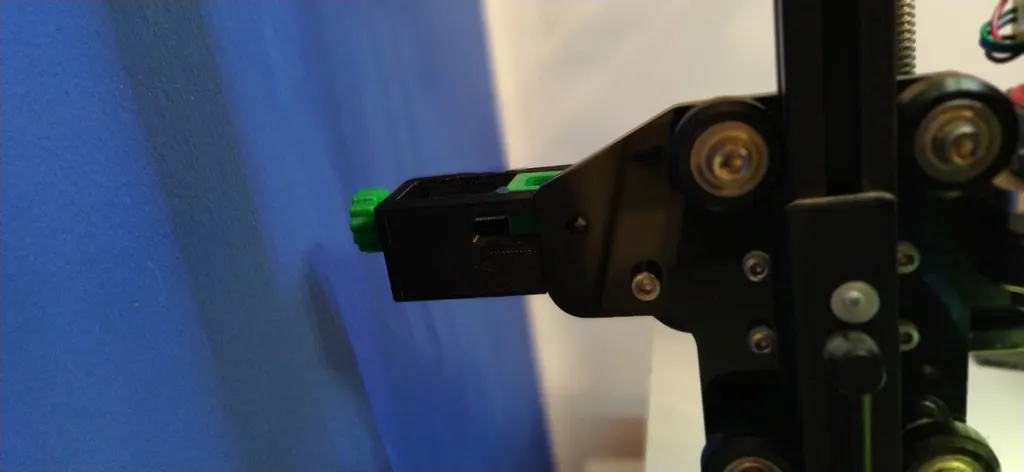
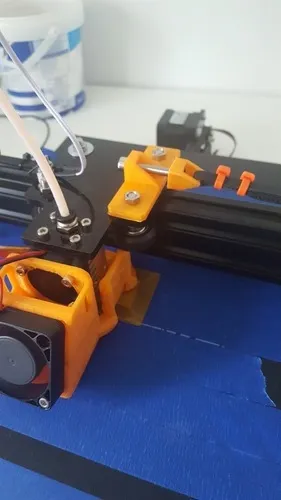
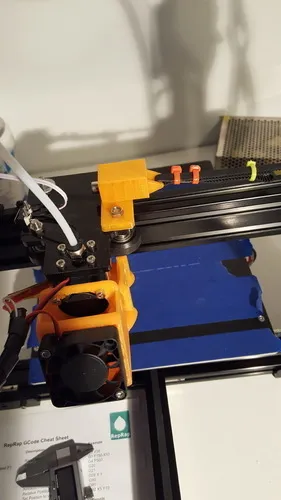
Removing the Old Belt
Locate the belt you need to replace. Usually, this is either the X-axis or the Y-axis belt. Identify how the belt is attached to the carriage and the motor pulley. Use the appropriate Allen wrench or screwdriver to loosen the screws or bolts that secure the belt. Carefully remove the old belt, noting its path around the pulleys and any tensioning mechanisms. It’s often helpful to mark the belt’s original position on the pulleys to aid in installing the new one correctly. Once the belt is detached, set it aside, but keep it nearby in case you need it for reference. Cleaning any dust or debris from the pulleys and surrounding components before installing the new belt is recommended.
Installing the New Belt
Carefully position the new belt, ensuring it follows the same path as the old one. Start by looping it around the motor pulley and then around the idler pulley, aligning it with the existing grooves. If your printer has any belt tensioning mechanisms, ensure they are in the correct position. Secure the belt by tightening the screws or bolts you loosened earlier. Make sure the belt is properly seated in the pulley grooves. If the belt is not aligned properly, the printer may encounter problems during printing. At this point, the belt should be snug but not overly tight, allowing it to move freely. Double-check the belt’s path to avoid any twists or obstructions.
Adjusting Belt Tension

Correct belt tension is crucial for print quality. The belt should be tight enough to prevent slipping but not so tight that it puts excessive stress on the motors and bearings. Most Tevo Tarantula printers have adjustable belt tensioning systems, often utilizing screws or other mechanisms. Use the Allen wrench to adjust the tensioning mechanism. Gently pluck the belt like a guitar string – it should produce a clear, low-pitched sound. If the belt is too loose, it may slip, causing inaccuracies in your prints. If it’s too tight, it can cause motor strain and premature wear. Make small adjustments and test the belt’s tension until you find the right balance. Ensure the belt moves smoothly and doesn’t bind during operation. The goal is to achieve optimal tension to ensure the printer’s smooth and accurate movement.
Testing and Calibration
After replacing the belt and adjusting the tension, it is important to test the printer’s functionality. Plug the printer back into the power source and turn it on. Check that the X and Y axes move smoothly and accurately across their full range. If the printer has an auto-leveling feature, run it to ensure it functions correctly. Check for any unusual noises or vibrations, which could indicate a problem with the belt or tension. Print a small test object, such as a calibration cube, to assess the accuracy of the prints. Examine the print quality, paying close attention to the dimensions and layer alignment. If necessary, make further adjustments to the belt tension and recalibrate the printer until you achieve satisfactory results.
Troubleshooting Common Issues
Belt Slippage

If you notice the belt slipping, it is often an indication of insufficient tension. Tighten the belt slightly, making sure not to over-tighten it. Check the belt for any signs of wear or damage, such as fraying or cracks. If the belt is damaged, replace it with a new one. Verify that the pulleys are clean and free of any debris that could be causing slippage. Ensure the motor pulley set screws are tight. Also, be aware that excessive printing speed can sometimes cause belt slippage; consider reducing the print speed settings.
Noisy Operation
Noisy operation can stem from several sources. First, check the belt tension. An overly tight belt may cause a high-pitched squealing noise. Loosen the belt slightly until the noise subsides. Examine the belt’s path for any obstructions or rubbing against other components. Lubricate the bearings and moving parts, if needed, but avoid getting any lubricant on the belt itself. Ensure the motor is securely mounted and that the screws are tightened. If the noise persists, there might be a problem with the motor or bearings. If the printer continues to be noisy, you may need to consult the printer’s manual or seek help from a professional.
Belt Misalignment
If the belt appears misaligned, causing it to rub against the frame or other parts, immediately power off the printer. Inspect the belt’s path to ensure it is correctly routed through all the pulleys and that the belt is properly seated in the pulley grooves. Check for any loose screws or bolts that might be causing the misalignment. Ensure the pulleys are aligned correctly; if necessary, adjust them. Examine the belt itself for any signs of damage or wear that could be causing it to run off track. Also, make sure the printer’s frame is square. A warped frame can cause belt misalignment. If the misalignment persists, you may need to consult the printer’s manual or contact technical support.
Maintenance and Prevention
Regular Inspection
Regular inspection is key to preventing belt issues. Check the belts regularly for signs of wear, such as fraying, cracks, or stretching. Examine the pulleys for any debris or damage. Verify the belt tension frequently, especially after extended use or if you notice any printing problems. Pay attention to any unusual noises or vibrations during operation, as these could indicate a problem with the belt or other components. Clean the belts and pulleys regularly to remove any dust or debris. Also, consider scheduling periodic maintenance checks as part of your 3D printing routine.
Lubrication
Proper lubrication of the moving parts of your Tevo Tarantula can help extend the life of the belts and other components. Use a suitable lubricant, such as lithium grease or a dry lubricant specifically designed for 3D printers. Apply the lubricant sparingly to the bearings and other moving parts, but avoid getting any lubricant on the belts themselves. Lubrication will reduce friction and wear, ensuring smoother operation. Re-lubricate the moving parts periodically, following the manufacturer’s recommendations. Remember that proper lubrication is crucial for smooth operations, as well as the lifespan of your belts and printer.
Proper Storage
If you have spare belts, proper storage is essential. Store them in a cool, dry place away from direct sunlight and extreme temperatures. This prevents the belt material from degrading over time. Keep the belts away from any chemicals or solvents that could damage them. Consider storing spare belts in a sealed bag or container to protect them from dust and moisture. By following these storage tips, you can ensure that your spare belts are ready for use when you need them, extending the life and reliability of your Tevo Tarantula 3D printer. This will also ensure that you don’t run into issues when it’s time to replace the belt again.