Embarking on your 3D printing journey can be an exciting adventure, and the Tarantula Pro 3D printer kit provides an excellent entry point. This guide will walk you through everything you need to know to get started, from unboxing and assembly to initial prints and troubleshooting. The Tarantula Pro is known for its affordability and ease of use, making it a favorite among beginners. With a bit of patience and the right guidance, you’ll be creating your own 3D models in no time.
Understanding the Tarantula Pro 3D Printer
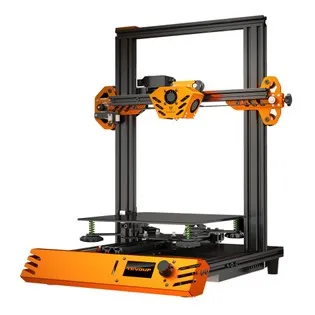
Before diving into the setup, it’s helpful to understand what the Tarantula Pro is all about. This printer is a Cartesian-style 3D printer, meaning its print head moves along three axes (X, Y, and Z) to create objects layer by layer. It utilizes fused deposition modeling (FDM) technology, where plastic filament is heated and extruded through a nozzle onto a print bed. This kit is a popular choice for hobbyists and educators due to its accessible price and straightforward design, allowing users to learn the fundamentals of 3D printing without a steep learning curve.
Key Features of the Tarantula Pro
The Tarantula Pro boasts several features that make it appealing to beginners. These include a relatively large build volume, allowing you to print moderately sized objects. It typically comes with a heated bed, which helps to prevent warping of the printed models, especially when using materials like ABS. Additionally, the printer often features an intuitive LCD screen for controlling printing operations and adjusting settings. Its open-frame design also allows for easy access during assembly, maintenance, and printing.
Specifications of the Tarantula Pro

Understanding the specifications can help you determine the printer’s capabilities. The Tarantula Pro usually offers a build volume around 220 x 220 x 240 mm, giving you ample space to print a variety of objects. It typically supports common filament types like PLA, ABS, and PETG, though you’ll need to adjust settings accordingly. The nozzle diameter is often 0.4mm, which is standard for many 3D printers, and it provides a good balance between print speed and detail. The printer’s print speed can vary, but it’s generally sufficient for hobbyist use, and it’s usually compatible with SD cards for transferring print files.
Unboxing and Preparing Your Tarantula Pro
Unboxing your Tarantula Pro is the first step. Take your time to carefully unpack all the components and ensure everything listed in the manual is present. Organize the parts and get familiar with the different components. The included manual provides a basic overview, but online resources often offer more detailed visual guides and community support, which can be extremely helpful during assembly. Proper preparation ensures a smoother and more successful assembly process.
What’s Included in the Kit
The Tarantula Pro kit typically includes the printer frame components, stepper motors, the heated bed, the extruder assembly, the control board, power supply, and various cables and connectors. You’ll also find tools like Allen wrenches, a scraper for removing prints, and possibly a small sample of filament. Check the parts list carefully to identify everything and set aside any screws or parts that are not immediately needed during initial assembly. It’s good practice to inventory the items immediately upon unpacking, as this is the best time to ensure everything is present and in good condition.
Tools You’ll Need

While the kit includes some tools, you’ll likely need a few additional items. A set of Allen wrenches (hex keys) is essential for tightening screws. A small Phillips head screwdriver can be helpful for some tasks. A pair of wire cutters and pliers can assist with cable management and cutting filament. You may also find a digital caliper useful for measuring parts and confirming dimensions during calibration. Having these extra tools on hand will simplify the assembly and maintenance process.
Initial Setup and Assembly
The assembly process can seem daunting at first, but following the instructions step-by-step will make it manageable. Take breaks when needed, and don’t hesitate to consult online resources like YouTube tutorials or community forums if you get stuck. The goal is to build the printer frame, attach the motors, assemble the extruder, and wire everything correctly. Remember that patience is key, and taking your time will lead to a more stable and accurate printer.
Step-by-Step Assembly Guide
Follow the assembly instructions provided in the manual. Start by assembling the frame, ensuring the parts are aligned correctly and the screws are tightened securely. Attach the stepper motors to their respective axes (X, Y, and Z), paying attention to the orientation. Assemble the extruder assembly, including the hot end and the extruder motor. Carefully route and connect all the wires to the control board. Double-check all connections before powering on the printer. Take your time and don’t rush through any steps.
Leveling the Print Bed

Bed leveling is crucial for successful prints. The Tarantula Pro usually uses a manual leveling system, where you adjust the bed height at each corner using the leveling screws. Before leveling, make sure the nozzle is clean and the bed is free of any debris. Use a piece of paper or a feeler gauge to adjust the height of the bed until the nozzle barely scratches the paper as you move it around. A properly leveled bed ensures the first layer of your prints adheres well to the bed and prevents warping.
Connecting the Printer to Power
Once the assembly is complete and the bed is leveled, you can connect the printer to power. Double-check all the wiring connections to ensure they are secure. Plug the power cord into the power supply and connect it to a wall outlet. Turn on the printer and check the LCD screen for any errors. Ensure the heated bed and nozzle heat up properly. If everything appears to be functioning correctly, you’re ready to move on to the software setup.
Software Setup and Slicing
Before you can print, you’ll need to install and configure slicing software. This software converts 3D models into instructions that your printer can understand. There are several free and open-source options available, each with its own features and user interface. The slicing software is a crucial step as it determines many of the print parameters, and getting it right is the key to producing quality prints.
Choosing Slicing Software

Popular slicing software options include Cura, Simplify3D, and PrusaSlicer. Cura is a widely used and free option with a user-friendly interface. Simplify3D is a paid software known for its advanced features and print quality, and PrusaSlicer offers excellent performance and is well-regarded. Research each option and consider your needs and skill level. For beginners, Cura is usually recommended due to its ease of use and extensive online support.
Configuring Slicer Settings
Slicer settings determine how your 3D model will be printed. Key settings to configure include the filament type, nozzle temperature, bed temperature, layer height, print speed, infill density, and support structures. Experimenting with these settings will help you optimize print quality and speed. Use pre-configured profiles for the Tarantula Pro or create your own based on your printer’s specifications and the filament you are using. Online resources can provide useful guides on specific settings and profiles.
First Print Guide and Calibration
With your printer assembled, leveled, and the software configured, you’re ready to print your first object. Before starting, make sure the bed is clean and free of debris. Select a simple model, such as a calibration cube or a small test object, to start. This will let you check your printer’s performance without wasting filament. Be ready to adjust settings or troubleshoot any issues that arise.
Loading Filament

Loading filament involves feeding the filament spool into the extruder. Heat the nozzle to the correct temperature for your filament type (typically PLA or ABS). Cut the filament end at a clean angle and insert it into the extruder until it feeds through the nozzle. Watch the nozzle to make sure filament is extruding smoothly. Make sure the extruder is not clogged before starting to print. If a clog occurs, you will need to clear it before proceeding.
Running a Test Print
Once the filament is loaded, you can start your first print. Select the G-code file from your SD card and start the print. Monitor the first layer closely to ensure it adheres properly to the bed. Observe the print quality and check for any issues like warping, stringing, or poor layer adhesion. Make any necessary adjustments to your settings based on the results of the test print. This first print is a valuable learning experience.
Troubleshooting Common Issues
3D printing can involve occasional issues. Understanding common problems and how to troubleshoot them is an essential part of the learning process. Be patient, use online resources to research problems, and develop a methodical approach to resolving issues. Keep notes on the settings and adjustments you make during troubleshooting, as it will help you refine your printing setup over time.
Addressing Filament Adhesion Problems

Poor bed adhesion is one of the most common issues. To improve adhesion, ensure your bed is level and clean. Try using a bed adhesive, such as a glue stick or hairspray. Adjust the nozzle height to ensure the first layer is properly squished onto the bed. Reduce the print speed for the first layer. Increase the bed temperature. Use a brim or raft in your slicer to increase the contact area between the print and the bed.
Dealing with Nozzle Clogging
Nozzle clogs can disrupt your printing process. These are often caused by filament debris or incorrect temperatures. Try increasing the nozzle temperature slightly or using a nozzle cleaning tool. Perform a ‘cold pull’ by heating the nozzle, extruding some filament, and then cooling it and pulling it out. Ensure your filament is stored in a dry place to prevent moisture absorption, which can cause clogs. Replace the nozzle if all other solutions fail.
Upgrading and Enhancing Your Printer
As you gain experience, you may wish to upgrade your Tarantula Pro to improve its performance or add new features. Common upgrades include replacing the stock hot end with an all-metal one for higher-temperature filaments, adding a glass bed for a smoother printing surface, or installing a filament runout sensor. These upgrades can improve your prints and enhance your overall 3D printing experience.
In conclusion, the Tarantula Pro 3D printer kit is an accessible and rewarding option for anyone looking to enter the world of 3D printing. By following this guide and applying patience, you can set up your printer, produce high-quality prints, and explore the endless possibilities of 3D modeling and design. Happy printing!