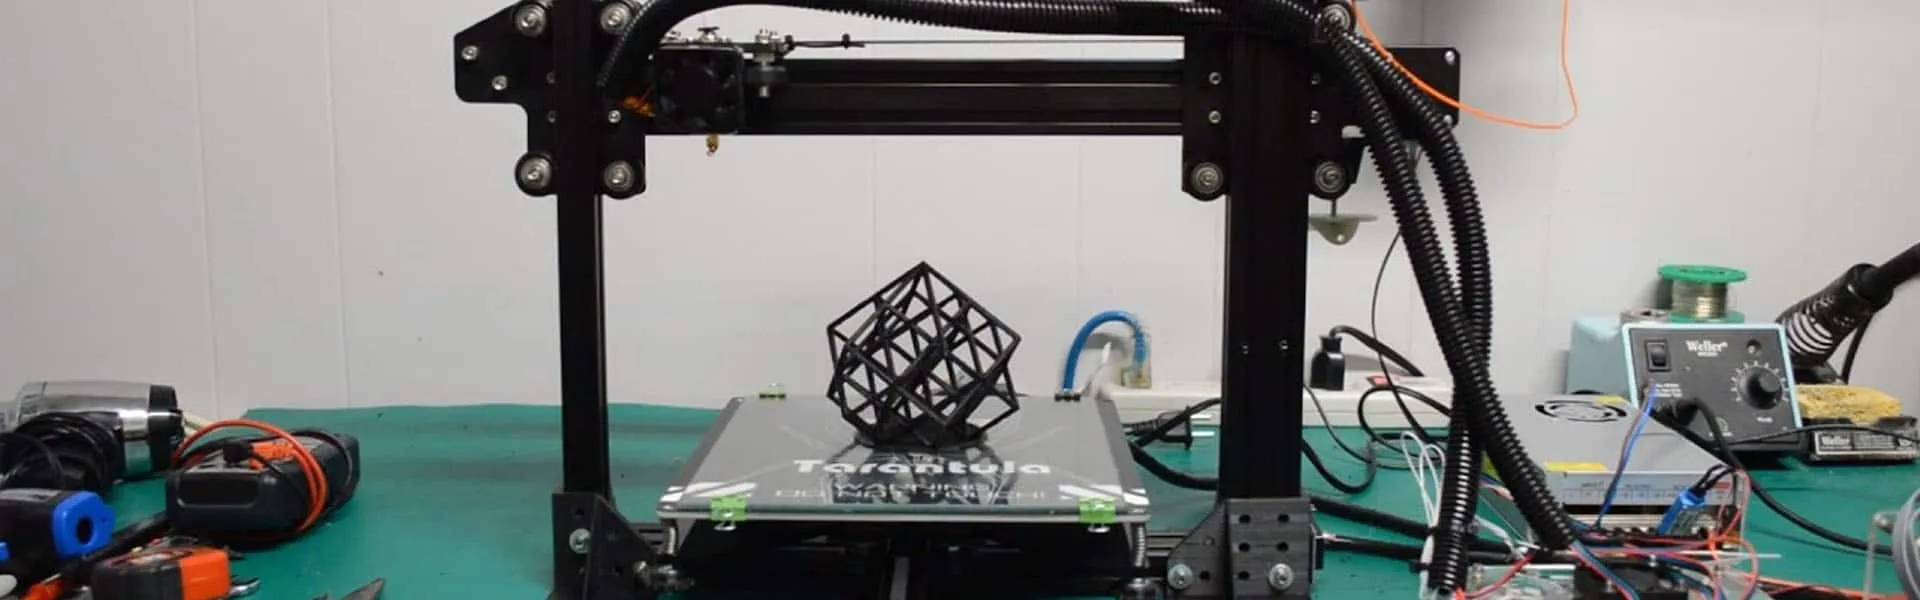
Understanding the Tevo Tarantula and Cura
The Tevo Tarantula is a popular and affordable 3D printer, known for its ease of assembly and open-source nature, making it a favorite among hobbyists and beginners. To unlock the full potential of your Tevo Tarantula, understanding how to configure the appropriate Cura settings is crucial. Cura is a user-friendly, open-source slicing software developed by Ultimaker. It transforms 3D models into instructions your printer can understand, dictating how it should move, deposit filament, and create your desired object. This guide will walk you through the essential Cura settings optimized for the Tevo Tarantula, enabling you to achieve high-quality prints and minimize common printing issues. Using the correct settings can dramatically improve print quality, reduce print time, and expand the range of materials you can successfully print with your Tevo Tarantula. This will ensure the long-term success and usability of the Tevo Tarantula.
Setting up Cura for Your Tevo Tarantula
Before diving into the specific settings, you need to set up Cura for your Tevo Tarantula. First, download and install the latest version of Cura from the Ultimaker website. Launch Cura, and you’ll be prompted to add a printer. Select ‘Add a non-networked printer.’ In the list of printers, search for ‘Tevo’ and select the Tevo Tarantula. If a profile doesn’t exist, you might need to manually configure the printer settings. This involves inputting the printer’s dimensions, including build volume (typically 200mm x 200mm x 180mm), nozzle diameter (usually 0.4mm), and bed shape. It is important to input all the necessary printer information to ensure proper slicing of your 3D models. Ensure that your settings match the physical characteristics of your printer to prevent errors or damage during the printing process. Consider consulting the Tevo Tarantula’s manual for accurate measurements. Make sure the printer is connected to your computer or ready to receive the files.
Printer Settings in Cura

Within Cura, the printer settings are the foundation for every print. These settings define the physical characteristics and capabilities of your Tevo Tarantula. Access these settings via the ‘Printer’ dropdown menu and select ‘Manage Printers.’ Here, you can modify various parameters. The most critical settings to verify include the build volume, which should match your printer’s specifications (200mm x 200mm x 180mm). Accurate measurements ensure that the software correctly calculates the print path. Also, specify the nozzle size; the default setting is often 0.4mm, which is a common size for the Tevo Tarantula. Selecting the right nozzle size impacts layer resolution and printing speed. Finally, verify that the heated bed is enabled if your Tevo Tarantula has one, as this impacts material selection and print adhesion. The accuracy of your printer settings significantly influences the final print quality and the printer’s overall performance.
Bed Size and Printhead Settings
The bed size settings within Cura must precisely match the physical dimensions of your Tevo Tarantula’s print bed. Incorrect bed size will cause the slicer to misinterpret the print area. This can lead to the model being clipped or printed partially off the bed, resulting in failed prints. Make sure the X, Y, and Z dimensions in Cura correspond to your printer’s bed size. Along with bed size, the printhead settings include the nozzle diameter and the distance between the nozzle and the print bed (Z-offset). The nozzle diameter influences the layer thickness and print detail, while the Z-offset affects the first layer adhesion. The Z-offset setting is essential for ensuring that the first layer adheres correctly to the print bed. If the nozzle is too far from the bed, the filament won’t stick, and if it’s too close, the nozzle might scratch the bed surface. Accurate settings in these areas are essential for successful prints. Make sure your bed is properly leveled.
Nozzle and Filament Settings
Nozzle settings are central to the print process. The nozzle diameter determines the line width and, to some extent, the layer height. A smaller nozzle (0.2mm or 0.3mm) allows for finer details but will slow down print speed, whereas a larger nozzle (0.6mm or 0.8mm) prints faster but with coarser details. Select the appropriate nozzle size based on the desired print resolution and speed. Also, Cura requires you to specify the filament type you are using. The filament setting includes the material type (PLA, ABS, PETG, etc.) and the filament diameter (usually 1.75mm). Selecting the right material will automatically pre-populate some of the settings based on the material. Other parameters include the printing temperature, bed temperature, and retraction settings. These settings affect the material’s extrusion, cooling, and adhesion characteristics. Using incorrect nozzle settings can cause material flow inconsistencies, leading to poor print quality. Adjust the temperatures based on the specific filament recommendations.
Print Speed and Quality Settings

Print speed and quality settings in Cura are critical for balancing print time and print quality. Start with a reasonable print speed, typically around 50mm/s for general printing, and adjust this based on the material and complexity of your model. For PLA, a speed range of 40-60mm/s is often suitable, while ABS can sometimes handle speeds up to 70mm/s. You can adjust the print speed for the first layer, infill, and outer walls independently to optimize different aspects of the print. Quality settings encompass layer height, infill density, and the number of outer walls. Layer height directly affects the print resolution, with lower layer heights resulting in smoother surfaces but longer print times. Infill density impacts the strength and material consumption, with higher densities providing more strength. The number of outer walls increases the print’s structural integrity. Fine-tune these settings to achieve the desired balance between print speed, print quality, and material usage. Make small adjustments to optimize your results.
Layer Height and Infill
Layer height, measured in millimeters, significantly influences the print’s resolution and surface finish. Lower layer heights (e.g., 0.1mm or 0.15mm) result in smoother surfaces and finer details, but extend print times considerably. Higher layer heights (e.g., 0.2mm or 0.3mm) provide faster printing, but with a more visible layer effect. The choice of layer height depends on your model’s complexity and desired print quality. Infill density, expressed as a percentage, affects the model’s internal structure and strength. A higher infill percentage (e.g., 50% or more) makes the print more robust and less prone to breakage, but also increases material consumption and print time. Infill patterns, such as grid, gyroid, or triangles, affect the internal structure and printing characteristics. Selecting the appropriate layer height and infill percentage is essential for balancing print quality, speed, and structural integrity. The Tevo Tarantula’s performance can be optimized for the specific needs of each print.
Temperature Settings for Optimal Prints
Temperature settings are among the most crucial for achieving successful 3D prints. They determine the material’s behavior and how it interacts with the print bed and other layers. Precise temperature control ensures proper melting, extrusion, and layer adhesion. Both nozzle and bed temperatures should be carefully adjusted to the specific filament used. Proper temperatures prevent issues such as warping, poor layer adhesion, and nozzle clogging. These parameters vary greatly depending on the filament. PLA typically prints at a nozzle temperature of 190-220°C and a bed temperature of 50-60°C, while ABS requires a nozzle temperature of 230-250°C and a bed temperature of 90-110°C. Always consult the filament manufacturer’s guidelines and perform test prints to find the optimal temperature settings. Small adjustments will help.
Bed Temperature

The bed temperature plays a pivotal role in the initial layer adhesion. The heated bed helps the first layer stick to the surface. An appropriately heated bed ensures the first layer adheres well, preventing warping and improving overall print quality. Each filament type requires a specific bed temperature. For PLA, setting the bed temperature to 50-60°C is usually adequate for good adhesion. ABS requires a higher bed temperature, typically 90-110°C, to prevent warping due to its higher thermal expansion coefficient. Use a bed temperature that ensures the first layer adheres and prevents the edges from lifting off the bed. A properly heated bed is essential, particularly for larger prints. For consistent adhesion, make sure your bed is level and clean.
Nozzle Temperature
The nozzle temperature is a critical setting as it directly influences the material’s extrusion and layer bonding. The nozzle needs to reach a temperature suitable for melting the filament. Selecting the right nozzle temperature is crucial for proper layer adhesion and preventing issues like under-extrusion or nozzle clogging. The optimal nozzle temperature will depend on the filament. As a general guide, PLA usually prints well within a temperature range of 190-220°C. ABS requires higher temperatures, typically 230-250°C, because of its higher melting point. PETG filament typically requires settings within 220-250°C. It’s best to consult the filament manufacturer’s guidelines. The correct temperature should ensure smooth material flow without causing excessive stringing or poor layer adhesion. Small adjustments can have a huge impact.
Cooling Settings in Cura
Cooling settings in Cura regulate how the printed layers cool, which impacts the overall print quality. Proper cooling prevents warping, stringing, and poor layer adhesion. The cooling fan, typically located near the nozzle, controls the airflow around the print. In Cura, you can enable and adjust the fan speed based on the layer height and material type. PLA usually benefits from active cooling, starting the fan shortly after the first layer is laid down. ABS and other materials, however, require less cooling as it can cause the part to crack or warp. For ABS, cooling can be turned off, or the fan speed can be limited. The cooling fan speed, typically set as a percentage, affects how quickly the layers solidify. Start with a moderate fan speed and adjust it based on the print results. The right cooling configuration is essential for managing overhanging features and achieving smooth, high-quality prints.
Support Structures and Their Importance

Support structures are necessary for printing overhangs and complex geometries that cannot be printed directly. They are temporary structures built during printing to support overhanging parts of your model, preventing sagging and ensuring dimensional accuracy. Without supports, overhangs, especially those exceeding 45 degrees, will droop or fail. Cura allows you to generate support structures automatically or manually. The importance of supports depends on the model’s design. Complex models or those with overhanging features usually require supports. Consider the design and features of your model. The quality of the supports is crucial to the success of the print. Adjust the support settings for a successful print.
Generating Supports
In Cura, support structures are generated through the ‘Support’ settings. You can choose between ‘Everywhere’ and ‘Touching Buildplate’ options. The ‘Everywhere’ setting generates supports under all overhangs. The ‘Touching Buildplate’ setting generates supports only from the build plate up, which can save on material and print time if only certain areas need support. Selecting the correct support type will make the post-processing step much easier. You can also adjust the support structure’s pattern (e.g., grid, lines, or triangles), support density (the percentage of support material used), and support overhang angle (the angle at which supports are generated). Experiment with the settings to find the best balance between support effectiveness and material consumption. For complex models, supports are crucial.
Support Placement
Accurate support placement is essential for printing complex models successfully. The placement of supports depends on the model’s overhangs. Cura provides various settings to control support placement. Adjusting the ‘Support Placement’ settings in Cura will ensure your supports effectively support the model without being too difficult to remove. You can also set the ‘Support Overhang Angle’ to determine when the supports will be generated. A lower angle creates more supports, which can be beneficial for complex models. Consider the orientation of the model and the angles of the overhangs. Proper placement can drastically improve the outcome of your print. In the software, you can preview the supports before printing, and adjust the settings to optimize their position and density.
Advanced Cura Settings for the Tevo Tarantula

Advanced settings in Cura allow for detailed control over the printing process. These settings can fine-tune the print quality, optimize material usage, and tackle specific printing challenges. Settings like retraction, Z-offset, and flow rate can refine your prints significantly. While not always necessary, they can be beneficial for solving some of the more complex printing issues. Some require more advanced knowledge of 3D printing. Experimenting with the advanced settings will improve your skill in the long run. These settings provide control over specific aspects of the print process.
Retraction Settings
Retraction settings are crucial for eliminating stringing and improving print quality, especially when printing with materials like PLA or PETG. Retraction involves pulling the filament back into the nozzle to prevent it from oozing or stringing between travel moves. In Cura, you can adjust the retraction distance (how far the filament is retracted), retraction speed (how quickly the filament retracts), and sometimes, the retraction extra prime amount. Experimenting with these parameters is essential for minimizing stringing and improving print quality. Increasing the retraction distance may help, but it could also cause under-extrusion if the retraction distance is too high. Adjust the settings to find the perfect combination. The right retraction settings are a key aspect of producing high-quality prints.
Z-Offset Calibration
The Z-offset setting defines the distance between the nozzle and the print bed at the beginning of the print. Accurate Z-offset calibration is critical for achieving good first-layer adhesion and smooth prints. If the Z-offset is too high, the filament will not stick to the bed, and the print will fail. If the Z-offset is too low, the nozzle will scratch the bed, leading to poor print quality. Correct calibration involves adjusting the Z-offset to ensure the nozzle is the proper distance from the bed during the first layer. You can adjust the Z-offset through the printer’s control panel or in Cura’s start and end G-code scripts. Proper calibration will dramatically improve the quality of your first layer. It is the foundation of a successful print.
Troubleshooting Common Printing Issues

Even with optimized Cura settings, you might encounter printing issues. Common problems include poor first-layer adhesion, stringing, warping, and cracking. Understanding these issues and their solutions will help you troubleshoot and improve your print quality. Several factors contribute to these issues, including incorrect temperature settings, bed leveling, and improper cooling. It’s a good idea to be aware of some of the more common problems and their solutions. With a bit of experience, you will be able to quickly identify and resolve them. Having the troubleshooting knowledge is important for producing successful prints.
First Layer Adhesion Problems
Poor first-layer adhesion is one of the most common 3D printing issues. It can manifest as the print not sticking to the bed. This can lead to the print detaching or warping. Several factors can contribute to poor adhesion. Ensure that the bed is level and clean before each print. Using a bed adhesion aid (such as glue stick, tape, or a build surface) can help, especially with challenging materials. Leveling the bed correctly is the most essential first step. Adjust the Z-offset to ensure the nozzle is the correct distance from the bed. Experiment with the bed and nozzle temperatures for your particular filament. Fixing first-layer adhesion is critical for print success.
Stringing and Blobs
Stringing, the formation of thin strands of filament between parts of the print, is a common problem, often caused by filament oozing from the nozzle during travel moves. Blobs, or small lumps of excess material, can also appear. Stringing can be minimized by adjusting retraction settings. Increase the retraction distance and speed, and fine-tune the travel speed to reduce oozing. Ensure the nozzle temperature is not too high. Reducing the nozzle temperature can sometimes help. Blobs can often be reduced by adjusting the print speed and ensuring the nozzle is clean. These issues can affect the quality of your prints, and it’s best to have an understanding of them.
Warping and Cracking
Warping, the curling of the print edges from the bed, and cracking, the appearance of fractures in the printed object, often occur with materials like ABS or PETG. These issues are usually caused by uneven cooling and thermal stress. They can often be prevented by controlling the ambient temperature and cooling. For ABS, using an enclosure to maintain a consistent temperature is helpful. Setting the bed temperature correctly and using a brim on your model can increase adhesion. Avoid excessive cooling, as it can exacerbate these issues. For ABS and PETG, reduce the cooling fan speed or turn it off. You might need to experiment to find the optimal settings. By addressing these issues, you will ensure high-quality prints.
Optimizing Cura Settings for Different Filaments
Each filament type (PLA, ABS, PETG, TPU, etc.) has unique printing characteristics. Therefore, optimizing Cura settings for each filament is essential. This involves adjusting temperature, print speed, bed adhesion, and cooling parameters based on the material’s properties. While a general starting point exists, the optimal settings vary based on the brand, color, and other factors. Consulting the filament manufacturer’s guidelines is crucial. The manufacturer will provide recommended temperature ranges, print speeds, and other settings. Some of the more common filament settings are shown below. Start with these, and fine-tune the settings to achieve the best results. Careful adjustments based on the material will improve the quality and the outcome of your prints.
PLA Filament Settings
PLA (Polylactic Acid) is the most popular filament due to its ease of printing, low odor, and biodegradability. Recommended settings for PLA include a nozzle temperature of 190-220°C and a bed temperature of 50-60°C. Printing speed is usually 40-60 mm/s. A part cooling fan at 50-100% is generally recommended. PLA is a user-friendly material that requires minimal bed preparation. A glass bed with a glue stick is a good choice. Due to its low warping tendency, PLA is a great starting point for beginners. The low printing temperature reduces the risk of warping.
ABS Filament Settings
ABS (Acrylonitrile Butadiene Styrene) is known for its durability and heat resistance. Recommended settings for ABS include a nozzle temperature of 230-250°C and a bed temperature of 90-110°C. Printing speed is typically 30-50 mm/s. It is often best to turn off the part cooling fan. ABS is prone to warping, so using a heated bed and an enclosure is essential. Using a brim is also helpful. ABS emits fumes during printing, so ensure adequate ventilation. For this material, precise settings and proper environmental conditions are crucial. Because of the higher printing temperatures, it’s important to use a build plate that can tolerate the heat.
PETG Filament Settings
PETG (Polyethylene Terephthalate Glycol-modified) is a popular choice for its balance of strength, flexibility, and ease of printing. Recommended settings for PETG include a nozzle temperature of 220-250°C and a bed temperature of 70-80°C. Printing speed is typically 40-60 mm/s. A cooling fan at 20-50% is often helpful. PETG usually requires minimal bed preparation. A build surface such as PEI can enhance adhesion. Unlike ABS, PETG has minimal odor. PETG offers a good balance of printability, strength, and flexibility.
Fine-Tuning Your Settings for Perfection
Fine-tuning your Cura settings is a continuous process of experimentation and adjustment. Even with recommended settings, your results might vary based on your printer, filament, and environmental conditions. The best way to optimize your settings is to perform test prints. Print a small calibration cube or a test model with various settings to assess the print quality. Observe the details. Note any issues such as warping, stringing, or poor layer adhesion. Make small incremental adjustments to the settings. Keep a log of your settings and the results to track progress. You can create a settings profile for each filament type and save it in Cura. This saves time and effort. With practice, you can fine-tune your settings to achieve optimal results and consistently produce high-quality prints with your Tevo Tarantula. Always make sure your machine is well maintained and that you’re using the correct components.